In addition, comprehensive reports and dashboards that demonstrate the relationship between project requirements and their execution help in transparent communication with teams.
Let us explore how to integrate Selenium with Jira for great efficiency, effectiveness, and accurate results.
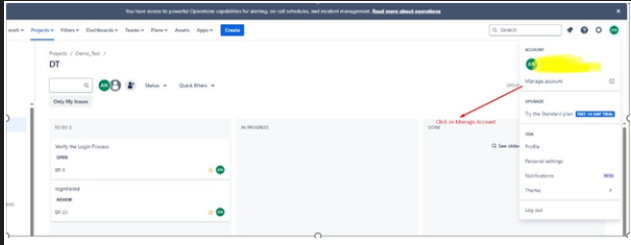
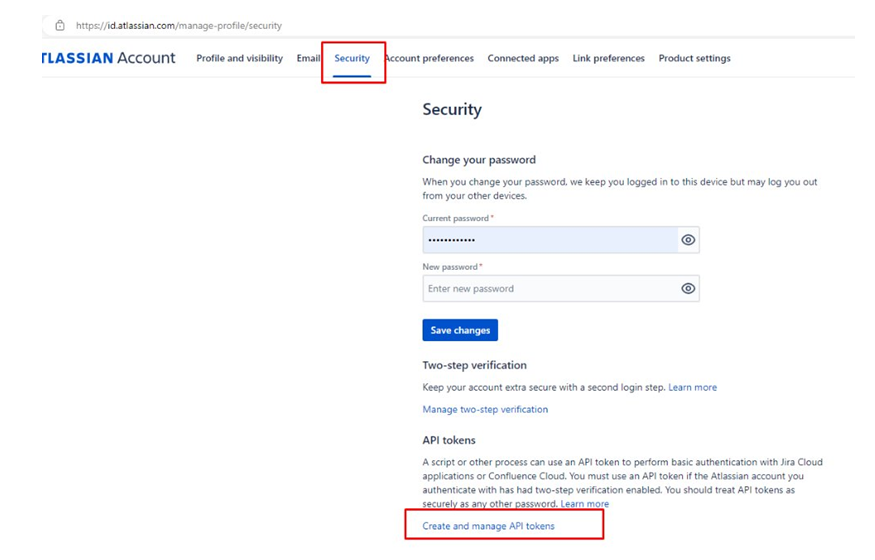
4. Navigate to
Security and click on Create and Manage API tokens.
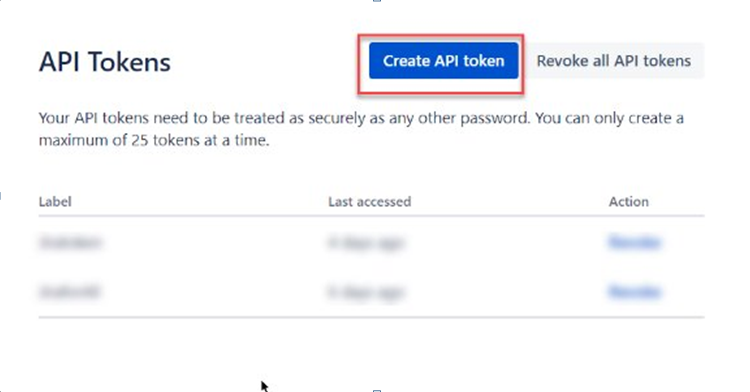
5. Click on Create an API token.
6. Click on Lable, give any memorable name, and click on Create.
7. Before closing the dialog, make sure to click on copy to clipboard and save it in the desired location.
API keys and tokens both are prominently used for permission and verification. These two may seem similar as they both work as credentials to access APIs but, they serve different purposes. Before moving forward, let’s be clear about the difference between the API key and the API Token.
The API token is generated by the service provider, it is a set of unique codes that feature user-specific information. It is used as a credential to authenticate the application to access API. Tokens can be used for a limited period of time, these are considered more flexible in managing access and enhancing security.
An API key is programmatically used which contains a large string of numbers or letters. An API key is secured for server-to-server communication. Most of them are static and can be configured with specific permissions or access levels.
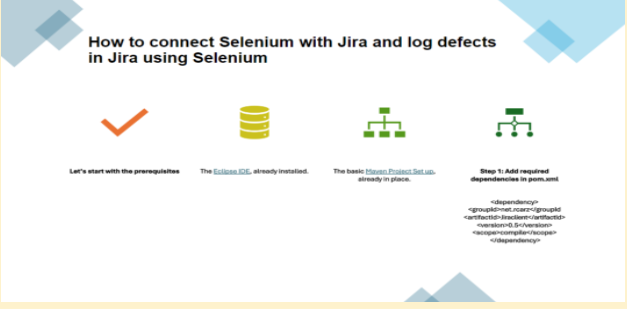
Let’s start connecting Selenium with Jira logs, it enables seamless integration of Selenium with Jira to identify defects and issues. The process starts with the prerequisites and ensures Eclipse IDE and Maven project setup are already installed.
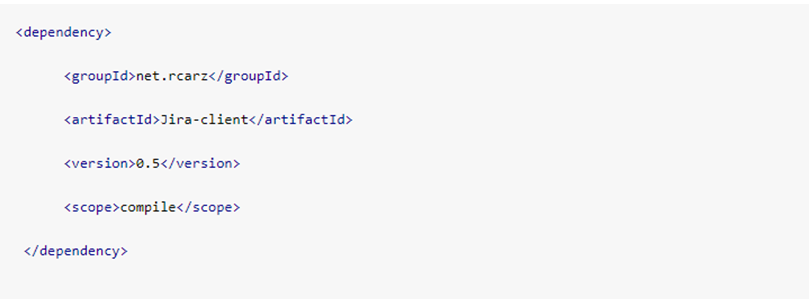
The next is to navigate pom.xml and check for dependencies or else we will be adding them as shown in the image below:
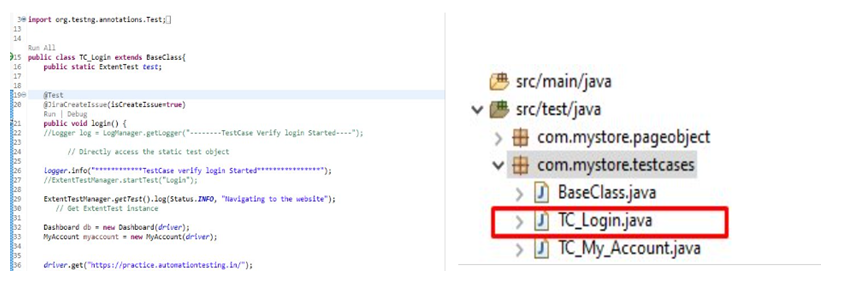
We will create two basic test cases under the package com.mystore.testcases and place them in the desired location. The condition is that one test case must pass and one must fail.
If we create a listener so that each time a test fails, it automatically creates the Jira issue method. This listener keeps track of test failures and executes specified code.
This example names the listener as TestListener.java, created inside the package com.mystore.utilities.
To authenticate with Jira API, you need to add Jira credentials to your Selenium test scripts. When creating a Jira service provider objective, remember the following pointer mentioned-
Password: if using Jira cloud, one must pass the API Token as a password. Using one’s login password might not work (example: API token lorelimpusm12uijk).
Project: This is the project key, often named with two letters (ex: BS). Using the full project name like the BrowserStack project might not work, so always use the short version.
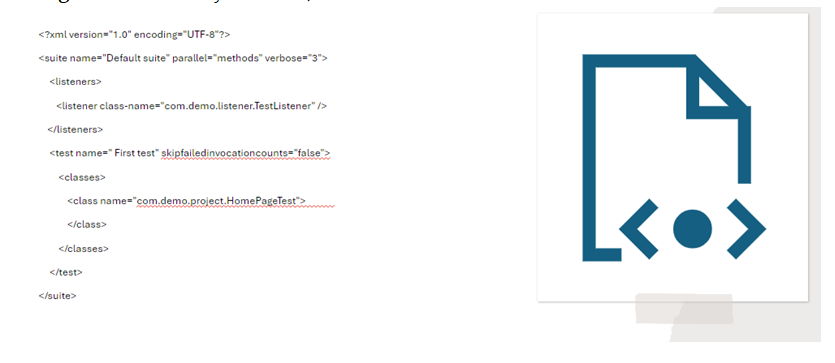
Once we have all the required set-up, we need to have a testng.xml file configured to run our tests. Our sample XML file looks like below. (You can use your existing testng.xml file to run your tests).
We can execute the tests once the setup is complete. Once tests are executed, any failures should automatically create a Jira ticket. After execution, view the result in the console.
As the failure occurred, on the Console we can clearly see the ticket in Jira as shown in the image below:
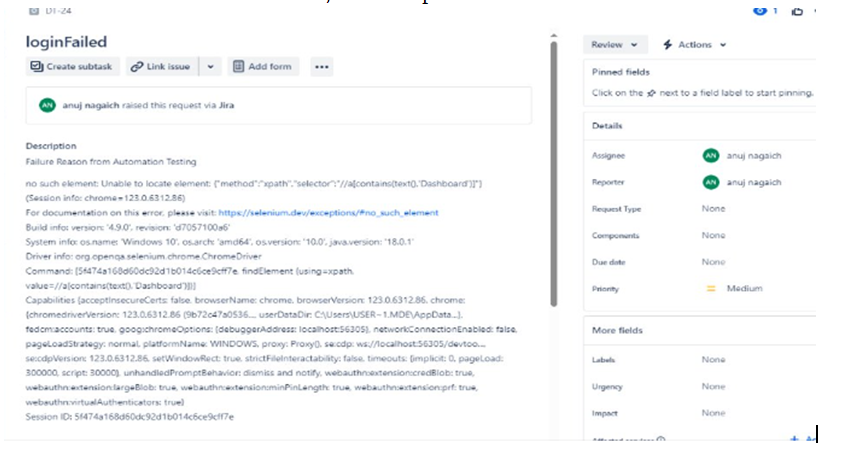
In the final step, we will need to navigate to the Jira dashboard to check whether an issue has been created or not. In the Jira dashboard, click on the project dashboard to see if a new issue has been created, the example is shown below:
Integrating Selenium tests with Jira offers a powerful toolset and systematic approach to software testing. By automating the problem tracking and logging process, testers may save manual work by using the Jira REST API client.
The Jira REST API client may be used to execute the majority of tasks available through the Jira user interface. Every developer and tester has serious concerns about device fragmentation because, for accuracy, all websites must function flawlessly across various devices, browsers, and operating systems.